Microsoft Edge is the latest browser installed by default on Windows PCs instead of Internet Explorer. Everyone knows the image of Internet Explorer and therefore Microsoft has decided to come back with a new browser, renamed. It has all the features you’d expect from a browser, and most importantly, it’s faster. If you use Microsoft Edge, this manual is for you. To learn how to install extensions on Microsoft Edge, click here.
The Microsoft Edge browser was introduced in 2015, but its performance was comparable to that of Internet Explorer. Today, things have changed radically, and the Microsoft Edge browser has also undergone significant changes.
The main advantage of Microsoft Edge is that it is based on the chrome navigation engine, similar to Chrome. This means you get all the features and support available in Google Chrome.
We know that Google Chrome is a powerful browser that consumes a lot of available resources. But today, Microsoft Edge offers the same functionality without costing huge resources. And Microsoft Edge provides privacy and security. Everyone loves Google Chrome because of its wide choice of extensions, themes and settings. And now we can get all these features on Microsoft Edge.
If you are new to the Microsoft Edge browser or looking for instructions on installing custom extensions. Then this guide is for you. To learn how to get extensions on Microsoft Edge, click here.

The process is similar to the Google Chrome browser. In fact, you also have a developer mode option in case you want to test one of your extensions on your Microsoft Edge. It’s very simple and useful. You can also install custom extensions directly from the Chrome Store.
Since Microsoft Edge provides synchronization for all items, including extensions, if you are using your old ID, you must enable the synchronization feature to retrieve extensions. If you have added your username and wish to add other extensions, please follow the instructions below.
Steps for adding extensions to Microsoft Edge from theShop
There are several ways to add extensions to Microsoft Edge. For example, installing extensions via a crx file (extension file) or installing extensions directly from the Extensions Store or the Chrome Store. Let’s start with the general method of installing from the extended memory.
- Open the latest Microsoft Edge browser on your computer.
- Log in with your Microsoft ID if you use the program regularly. You can also skip this step.
- Now click on the three dots in the upper right corner and select the Extensions option.
- Make sure the left pane checks to see if you allow extensions from other stores if you want to install extensions from the Chrome Web Store.
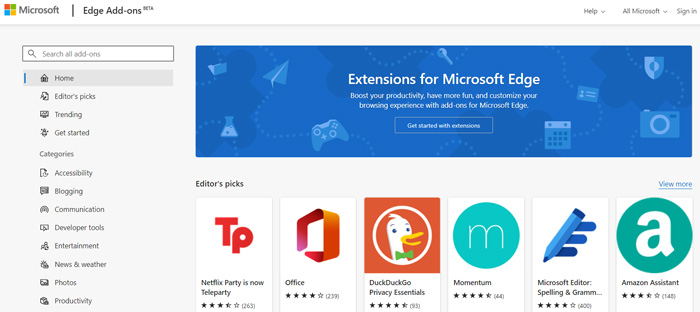
- Click Get Extensions for Microsoft Edge and you will be redirected to the repository (Edge Add-ons).

- You can now search for extensions in the search bar. Take Zoom, for example.
- After opening the Add page, click the Get button.

- Now click on the Add extension button in the pop-up window.
- You can then download and install the extension in your Microsoft Edge browser.
- You can now access the extension by clicking on the extension icon.
If you cannot find the extension in the Microsoft Edge Store, you can install it from the Chrome Store or from the CRX file. Because this is an unusual method, we offer a step-by-step guide.
Steps for manually adding extensions to Microsoft Edge (CRX file)
Since the latest version of Microsoft Edge works the same way as Chrome, you can also install CRX extension files on Edge. In other words, if you have accidentally deleted an extension and want to restore it, you can follow this manual. Here we will install the IDM CRX file on Microsoft Edge as an example to explain the method. You can replace other extensions with IDM to install other extensions using the same procedure.
To do this, you need a CRX file, which you can find on the internet or in the folder where you installed the relevant application. If you z. B. IDM is installed by default, you can find the IDMGCExt.crx file in C:Program Files (x86) Internet Download Manager. It’s now a question of following the instructions.
- First download or search for the crx file of the extension you want to install.
- Update your Microsoft Edge with the latest version and open it.
- Click on the three dots in the upper right corner and select Extensions.
- Now activate the developer mode in the left bar.

- Navigate to the location of the CRX file with the appropriate extension.
- Drag the crx file to the Microsoft Edge extension page.
- A pop-up window asks for confirmation, so click Add an extension to continue.

- It is now installed in the Edge browser and you can use it normally.
So it’s very easy to add extensions to your Edge browser. Since the process is similar to that of chromium, you won’t find anything complicated. I hope you find this guide useful. And when you do, don’t forget to share it with other Microsoft Edge users.
You can find all of this in the How to Add Custom Extensions in Microsoft Edge tutorial. And if you have any questions, please let us know in the comments section.
Other guides :
Related Tags:
microsoft edge extensions,best microsoft edge extensions,where are edge extensions stored,edge extensions development,microsoft edge themes,how do i manage add-ons in microsoft edge,chromium edge extensions,new edge extensions,edge extensions android,how to add idm extension in microsoft edge


